

Air Conditioner Disinfection Process for Dubai Residences
Did you know that a dirty air conditioning unit can hold up to 900 types of bacteria? Clean indoor air starts with proper AC maintenance, especially before deep disinfection. Preparing your air conditioner the right way not only protects your investment, it helps prevent health problems caused by dust, mold, and lingering microbes. By getting your unit ready for thorough cleaning, you set the foundation for safer, more efficient cooling throughout your home.
Table of Contents
Contents
- 1 Table of Contents
- 2 Quick Summary
- 3 Step 1: Prepare the Air Conditioning Unit for Disinfection
- 4 Step 2: Dismantle and Access Internal AC Components
- 5 Step 3: Deep Clean Each AC Part Using Biosanitisers
- 6 Step 4: Disinfect Coils, Blowers, and Ducts Scientifically
- 7 Step 5: Verify Disinfection Quality and System Functionality
- 8 Ensure Your Dubai Home’s AC Is Truly Clean and Safe
- 9 Frequently Asked Questions
- 9.0.1 How do I prepare my air conditioner for disinfection?
- 9.0.2 What is the process for dismantling my AC unit safely?
- 9.0.3 What type of biosanitiser should I use for deep cleaning my AC?
- 9.0.4 How can I effectively disinfect the coils and ducts in my air conditioning system?
- 9.0.5 What steps should I take to verify the disinfection quality of my AC?
- 9.0.6 What should I do if I encounter issues after disinfecting my air conditioner?
- 10 Recommended
- Step 1: Prepare The Air Conditioning Unit For Disinfection
- Step 2: Dismantle And Access Internal AC Components
- Step 3: Deep Clean Each AC Part Using Biosanitisers
- Step 4: Disinfect Coils, Blowers, And Ducts Scientifically
- Step 5: Verify Disinfection Quality And System Functionality
Quick Summary
| Key Point | Explanation |
|---|---|
| 1. Prepare your AC unit carefully | Ensure your AC is cleanable and accessible before starting disinfection to avoid damage and enhance efficacy. |
| 2. Follow manufacturer’s disassembly guidelines | Refer to the specific manual to safely dismantle the unit, keeping screws organized for easy reassembly. |
| 3. Use biosanitisers for deep cleaning | Apply specialized biosanitisers to each part of the system, working methodically to ensure comprehensive sanitization. |
| 4. Disinfect coils and ducts thoroughly | Use HVAC-specific disinfectants, ensuring even coverage on coils, blowers, and ducts to maintain system performance. |
| 5. Verify cleaning and functionality | Inspect cleaned components and test the system to confirm effective disinfection and optimal operation. |
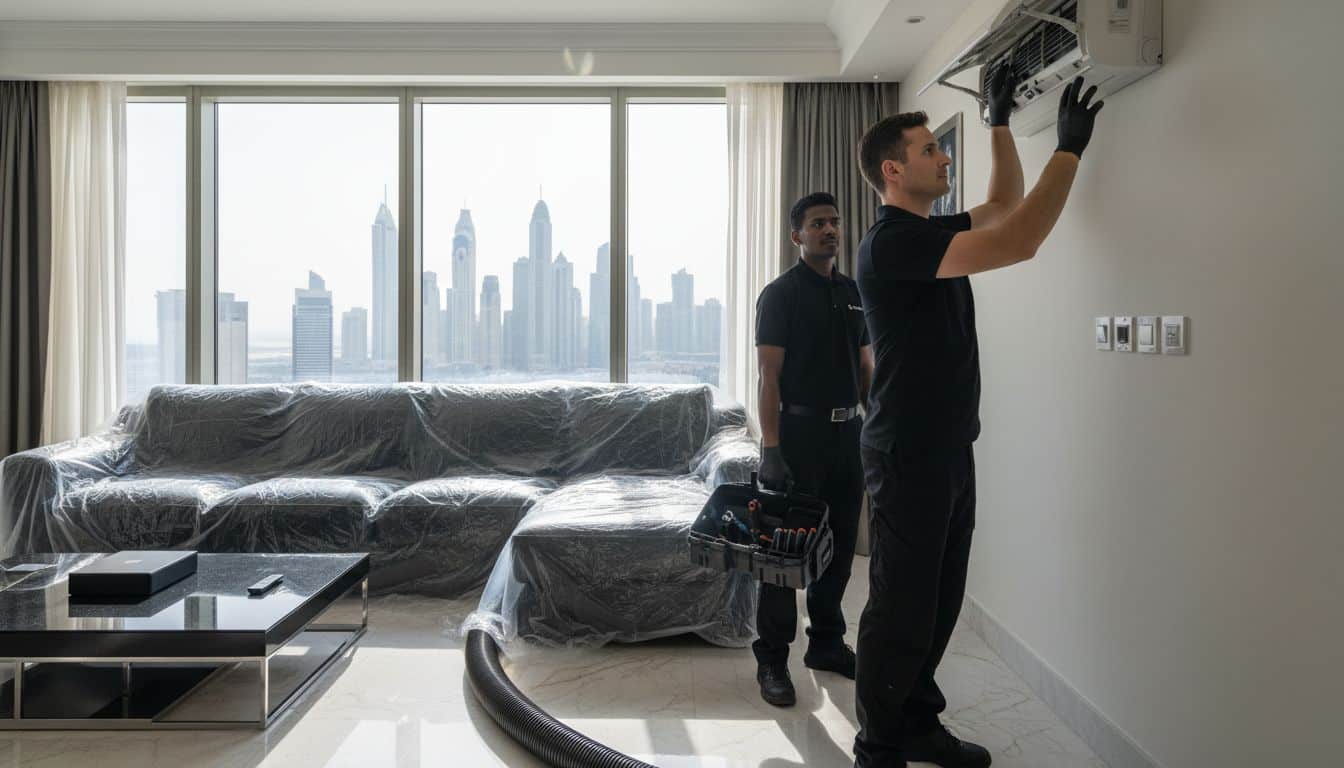
Step 1: Prepare the Air Conditioning Unit for Disinfection
Before diving into the disinfection process, you need to properly prepare your air conditioning unit. This crucial first step ensures a thorough and effective cleaning that will restore your AC’s performance and air quality. Leaving for the Summer? Here’s How to Prepare Your AC for a 3-Month Break (Without It Turning Into a Dusty Disaster) provides additional context for unit maintenance.
According to islandhealth, the first critical task is confirming your air conditioning unit is cleanable and has fully accessible surfaces, filters, and drip trays. Start by completely powering down the unit at the circuit breaker to ensure electrical safety. Remove the front panel carefully and inspect the internal components. Look for any visible dust buildup, debris, or early signs of mold growth around filters, coils, and drainage areas.
Careful preparation is key to a successful disinfection. Remove and set aside removable components like air filters, ensuring they are labeled if you have multiple units. Check each filter for excessive dirt or damage that might require replacement. For split system or central AC units, you will want to access both indoor and outdoor components. Lay down protective coverings on surrounding floors and furniture to catch any falling dust or moisture during the disinfection process. Remember that thorough preparation not only makes the actual cleaning easier but also helps prevent potential damage to your expensive HVAC equipment.
Warning: Never attempt to disassemble complex AC components without proper knowledge. If you encounter intricate mechanisms or are unsure about any step, it is always recommended to consult professional technicians who can safely prepare and disinfect your air conditioning system.
Step 2: Dismantle and Access Internal AC Components
Dismantling your air conditioning unit requires precision and care to ensure every internal component is accessible for thorough cleaning and disinfection. With the right approach, you can safely expose the hidden areas where dust, mold, and bacteria tend to accumulate. Does Regular AC Cleaning Prevent Breakdowns offers additional insights into why this process matters.
According to islandhealth, when dismantling air conditioning units, you must follow the manufacturer’s guidelines to access internal components safely. Start by referencing your unit’s specific manual for exact disassembly instructions. Generally, this involves carefully removing the front panel or cover using appropriate screwdrivers. Take care to keep screws organized and in sequence to ensure easy reassembly later.
Careful systematic disassembly is crucial for comprehensive cleaning. Remove the air filters first, setting them aside for separate cleaning or replacement. Next, gently detach the front grille and any protective covers that block access to internal components like evaporator coils, blower fans, and drain pans. Work slowly and methodically to avoid damaging delicate parts. Use soft brushes or microfiber cloths to remove initial dust layers before detailed disinfection. Take photos or create a simple diagram during disassembly to help you remember the exact configuration when reassembling.
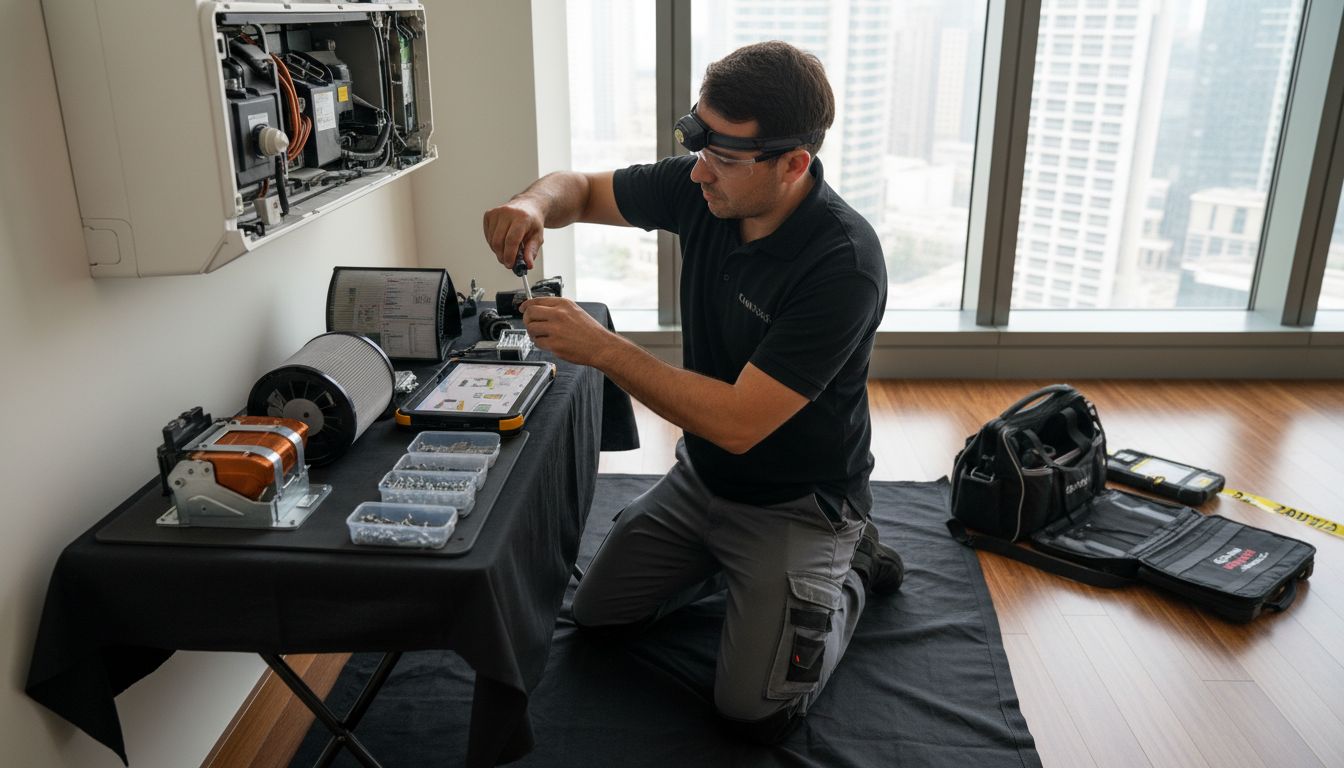
Warning: Different AC models have unique disassembly requirements. If you feel uncertain about any step or encounter resistance while dismantling components, stop immediately and consult a professional technician who can safely navigate your specific air conditioning system.
Step 3: Deep Clean Each AC Part Using Biosanitisers
Deep cleaning your air conditioning system requires a systematic approach using specialized biosanitisers that can eliminate harmful microorganisms and accumulated grime. This critical step transforms your AC from a potential breeding ground for contaminants into a pristine cooling system. AC Cleaning Dubai – Top 7 Benefits You Should Know provides additional context about why thorough cleaning matters.
According to errecom, the key is to utilize biosanitisers strategically across each component. Begin by applying the sanitiser to filters, coils, and drip trays, ensuring complete coverage and allowing it to act for the recommended duration. For maximum effectiveness, use microfiber cloths or soft brushes to gently work the biosanitiser into hard-to-reach areas, paying special attention to crevices where microorganisms can hide. Alternatively, stindustry suggests using dry saturated steam as an advanced biosanitising technique that can penetrate deeply and eliminate up to 99.999% of pathogens without harsh chemicals.
While cleaning, maintain a systematic approach. Start with removable components like filters and work your way through internal mechanisms. Use separate clean cloths for different parts to prevent cross-contamination. Wear protective gloves and ensure proper ventilation during the process. After applying the biosanitiser, allow sufficient time for it to work effectively before wiping or rinsing components.
This meticulous approach ensures not just surface cleaning but a comprehensive sanitization that improves your air conditioning system’s performance and indoor air quality.
Warning: Different biosanitisers have specific application instructions. Always read the manufacturer’s guidelines carefully and test on a small area first to ensure compatibility with your specific AC unit’s materials.
Step 4: Disinfect Coils, Blowers, and Ducts Scientifically
Disinfecting the internal components of your air conditioning system requires a precise and scientific approach to eliminate harmful microorganisms and ensure optimal performance. This step is crucial for maintaining a healthy indoor environment in Dubai’s unique climate. 5 Smart Insights on AC Coil Cleaning Dubai: Boost Efficiency & Protect Against Salt-Air Corrosion provides additional context for comprehensive AC maintenance.
According to errecom, applying disinfectants specifically designed for HVAC systems is critical. Focus on thoroughly covering coils, blowers, and ducts, ensuring the disinfectant reaches all surfaces and remains active for the recommended duration. stindustry suggests an advanced alternative using dry saturated steam, which can penetrate deep into components and eliminate pathogens without leaving chemical residues. When applying disinfectant, use specialized spray equipment that can reach every nook and cranny of your AC system, paying extra attention to areas prone to moisture accumulation.
For optimal results, work methodically through each component. Start with the coils, using a fine mist spray to ensure complete coverage without oversaturating. Move to the blower mechanisms, carefully applying disinfectant to fan blades and housing. When addressing the ducts, use extended nozzle attachments that can reach deep into the ventilation system. Be sure to wear protective gear like gloves and a mask, and ensure proper ventilation during the process. Allow sufficient time for the disinfectant to work its magic before reassembling the unit.
Warning: Different AC systems may require specific disinfection techniques. Always consult your unit’s manual and consider professional assistance if you are uncertain about any step in the process.
Step 5: Verify Disinfection Quality and System Functionality
The final stage of your air conditioning disinfection process involves carefully verifying the quality of your cleaning and ensuring the entire system functions perfectly. This critical step transforms your technical cleaning effort into a guarantee of clean, safe indoor air. Professional AC Cleaning & Disinfection offers comprehensive insights into maintaining top system performance.
According to islandhealth, post-disinfection inspections are essential to confirm the integrity and safety of air conditioning units. Begin by visually examining each component you have cleaned. Check for any remaining dirt or residue, ensuring all surfaces appear uniformly clean. Test the system by running it through a complete cycle and listening carefully for any unusual sounds that might indicate incomplete cleaning or potential mechanical issues.
To thoroughly verify functionality, assess multiple performance indicators. Check airflow from each vent to confirm consistent and smooth air distribution.
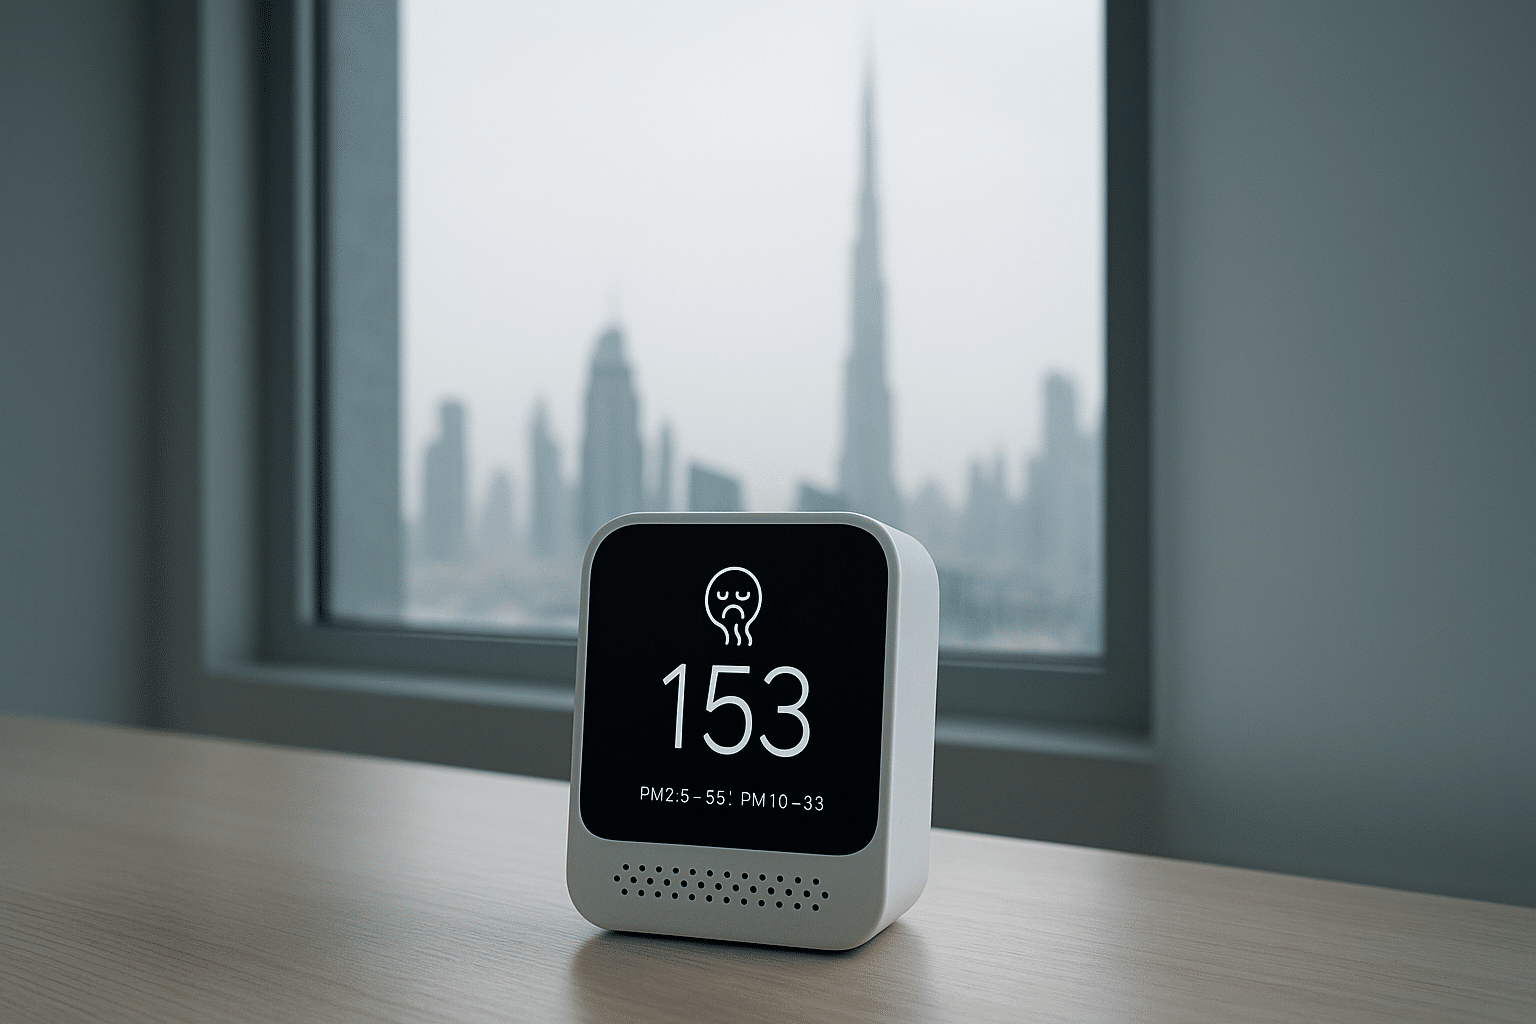
![]() Monitor the temperature differential between input and output to ensure efficient cooling. Pay attention to any unusual odors which could signal incomplete disinfection. Take temperature and humidity readings in different rooms to validate the system is operating at optimal levels. These detailed checks will help you confirm that your disinfection process has not just cleaned but genuinely restored your air conditioning system to peak performance.
Monitor the temperature differential between input and output to ensure efficient cooling. Pay attention to any unusual odors which could signal incomplete disinfection. Take temperature and humidity readings in different rooms to validate the system is operating at optimal levels. These detailed checks will help you confirm that your disinfection process has not just cleaned but genuinely restored your air conditioning system to peak performance.
Warning: If you notice any persistent issues or feel uncertain about the system’s performance, do not hesitate to contact professional HVAC technicians who can provide a comprehensive evaluation and address any potential problems.
Ensure Your Dubai Home’s AC Is Truly Clean and Safe
The detailed air conditioner disinfection process for Dubai residences highlights common challenges like hidden mold, dust buildup, and stubborn bacteria lurking in coils, blowers, and ducts. If you want to stop worrying about unseen contaminants compromising your indoor air quality and AC performance, you need a cleaning solution that goes beyond surface dusting. Effective preparation, dismantling, and the use of hospital-grade biosanitisers are essential steps to restore your air conditioning system’s health and efficiency.
At Saniservice, we understand these exact concerns. Our AC Cleaning & Maintenance – Saniservice AC Cleaning team uses advanced, evidence-based methods rooted in microbiology and HVAC science to meticulously disinfect every part of your unit safely and thoroughly. 
Don’t wait until poor air quality affects your health or audio clues hint at mechanical issues. Trust Dubai’s leading experts who combine Swiss precision with chemical-free sanitisation to deliver lasting protection. Visit Saniservice now to schedule your AC disinfection and ensure your indoor environment stays clean, safe, and comfortable all year round.
Frequently Asked Questions
How do I prepare my air conditioner for disinfection?
To prepare your air conditioning unit for disinfection, power it down at the circuit breaker and carefully remove the front panel. Inspect the filters and internal components for dust and mold, and remove any removable parts for separate cleaning.
What is the process for dismantling my AC unit safely?
Dismantle your air conditioning unit by following the manufacturer’s manual for correct disassembly instructions. Organize screws and take photos during the process to assist in reassembly, ensuring you do not damage any sensitive components.
What type of biosanitiser should I use for deep cleaning my AC?
Use a biosanitiser specifically designed for HVAC systems, applying it to filters, coils, and drip trays for thorough cleaning. Ensure complete coverage and let the biosanitiser sit for the recommended duration before wiping it off to ensure effective disinfection.
How can I effectively disinfect the coils and ducts in my air conditioning system?
To disinfect coils and ducts, apply a suitable disinfectant using specialized spraying equipment, ensuring it reaches all surfaces. Concentrate on areas prone to moisture and allow the disinfectant adequate time to work before reassembling the AC.
What steps should I take to verify the disinfection quality of my AC?
After cleaning, visually inspect each component and run the system through a full cycle. Check for smooth airflow and temperature differentials to confirm operational efficiency, ensuring all surfaces are clean and no unusual odors are present.
What should I do if I encounter issues after disinfecting my air conditioner?
If you notice persistent issues like unusual sounds or inefficiency after disinfection, consult a professional HVAC technician for a comprehensive evaluation. Taking prompt action can help address potential mechanical problems and restore your system’s performance.
Recommended
- 5 Essential Benefits of AC Disinfection Abu Dhabi for Healthier Indoor Environments – Saniservice AC Cleaning
- 5 Essential Insights on AC Duct Sanitization Dubai: Ensuring Cleaner, Safer Air in Your Home – Saniservice AC Cleaning
- How to Remove AC smell in Dubai UAE – Saniacservice
- 7 Best Practices for Central AC Cleaning in Dubai
Leave a Reply