

HVAC Cleaning Process 2025: Step-By-Step Guide for Healthier Air
Did you know that a neglected HVAC system can reduce indoor air quality by up to 40 percent? Clean air matters for your comfort and health, yet many overlook the right steps when caring for these units. By following a structured cleaning routine, you not only extend your system’s lifespan but also protect your family from dust, allergens, and unexpected breakdowns.
Table of Contents
Contents
- 1 Table of Contents
- 2 Quick Summary
- 3 Step 1: Prepare the Workspace and Secure Safety
- 4 Step 2: Dismantle and Inspect HVAC Components
- 5 Step 3: Deep Clean Coils, Blowers, and Drainage Trays
- 6 Step 4: Sanitise Ducts Using Hospital-Grade Biosanitisers
- 7 Step 5: Reassemble System and Verify Cleanliness
- 8 Ensure Healthier Air with Expert HVAC Cleaning from Saniservice
- 9 Frequently Asked Questions
- 9.0.1 How should I prepare my workspace for HVAC cleaning?
- 9.0.2 What steps should I take to safely dismantle HVAC components?
- 9.0.3 How do I deep clean HVAC coils and blowers effectively?
- 9.0.4 What should I use to sanitize my HVAC ducts?
- 9.0.5 How do I verify the cleanliness and performance of my reassembled HVAC system?
- 9.0.6 How often should I clean and sanitize my HVAC system for healthy air?
- 10 Recommended
- Step 1: Prepare The Workspace And Secure Safety
- Step 2: Dismantle And Inspect HVAC Components
- Step 3: Deep Clean Coils, Blowers, And Drainage Trays
- Step 4: Sanitise Ducts Using Hospital-Grade Biosanitisers
- Step 5: Reassemble System And Verify Cleanliness
Quick Summary
| Key Point | Explanation |
|---|---|
| 1. Wear Proper Protective Equipment | Always use PPE such as gloves, glasses, and respirators to ensure safety during HVAC maintenance. |
| 2. Clear Workspace Before Starting | Remove furniture and sensitive items to prepare a clean and safe area for your HVAC cleaning project. |
| 3. Document System Condition Before Cleaning | Take photos of the HVAC system to record its state and guide reassembly after cleaning is complete. |
| 4. Use Specialized Cleaning Solutions | Employ recommended cleaning solutions for coils and components to maintain efficiency and protect materials. |
| 5. Conduct Thorough Performance Testing | After reassembly, verify the HVAC system’s airflow and function to ensure optimal performance and cleanliness. |
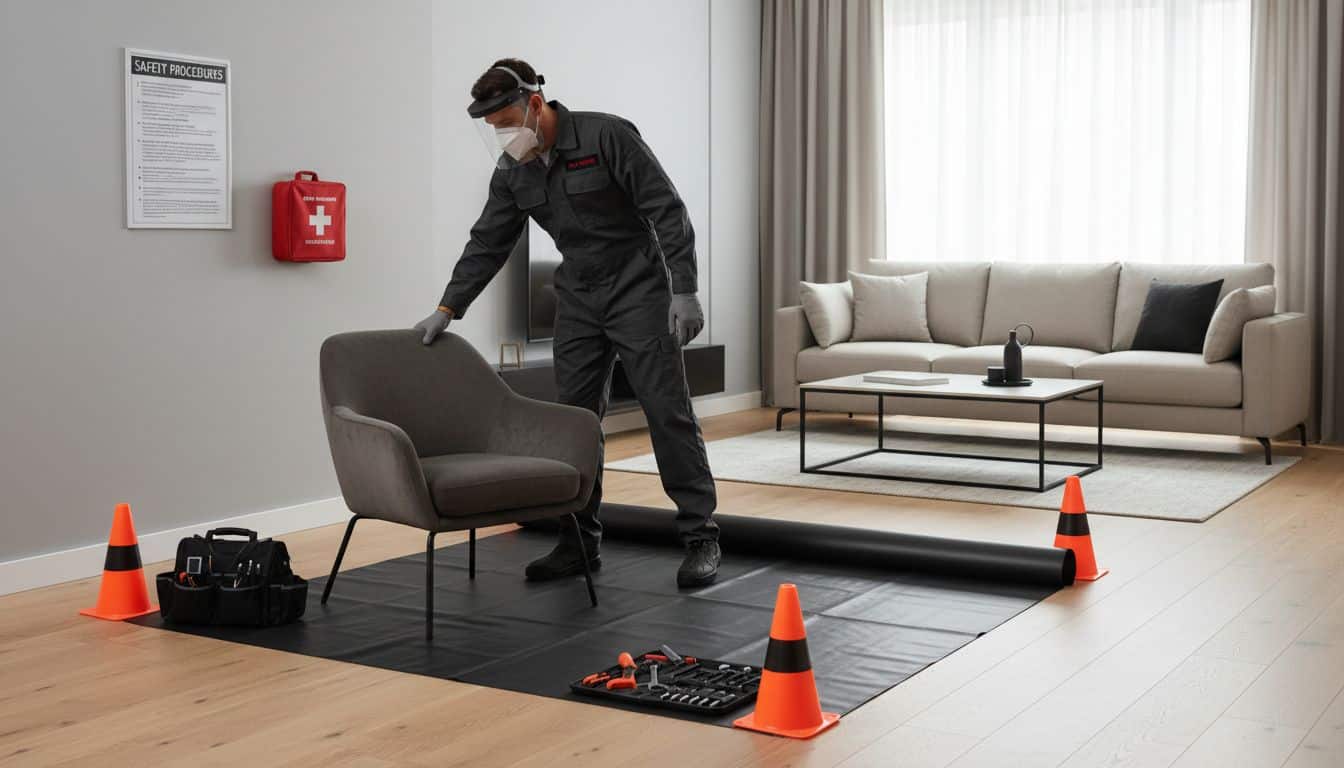
Step 1: Prepare the Workspace and Secure Safety
Preparing your workspace for an HVAC cleaning project requires strategic safety planning and the right protective equipment. Before you start dismantling your air conditioning system, you need to create a secure environment that protects both you and your equipment.
According to Snarsca, professional HVAC maintenance demands comprehensive personal protective equipment (PPE). This means gearing up with specific safety items such as flame-resistant clothing, ANSI-approved safety glasses, insulated gloves, NIOSH-certified respirators, and steel-toe boots. These are not just recommendations but critical safeguards that prevent potential injuries during complex cleaning procedures.
Before beginning work, clear the surrounding area of furniture and sensitive items. Establish a dedicated workspace with adequate lighting and ventilation. Ensure all electrical connections are properly disconnected using Lockout/Tagout (LOTO) procedures to prevent accidental system energization. Pro tip: Always keep a first aid kit nearby and inform someone about your maintenance work in case of emergencies.
Your next step will involve carefully inspecting the HVAC system for any visible damage or potential hazards before proceeding with the detailed cleaning process.
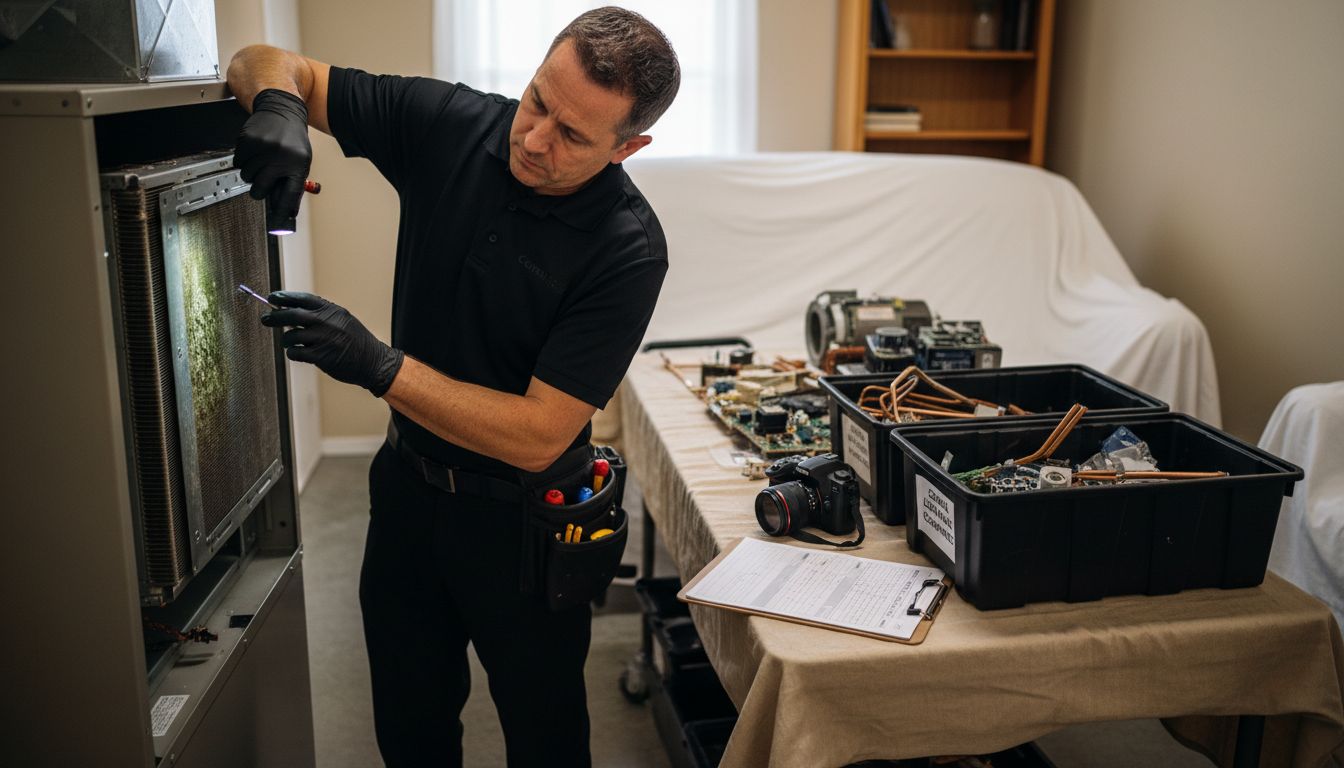
Step 2: Dismantle and Inspect HVAC Components
Dismantling and inspecting your HVAC components is a critical stage in the cleaning process that requires precision, patience, and systematic approach. During this phase, you will carefully deconstruct the system to assess its internal condition and identify potential areas of concern.
According to Tony Kelly Inc, the initial steps involve setting up containment zones to protect your surrounding environment. This means laying down protective coverings on floors and furniture and using specialized barriers to prevent dust and debris from spreading during the disassembly process. Start by photographing the system from multiple angles to create a reference for reassembly and document any existing wear or damage.
Begin the dismantle process by disconnecting electrical connections and removing outer panels systematically. Organize components carefully on a clean surface, keeping small parts in labeled containers. Inspect each piece thoroughly for signs of corrosion, mold growth, accumulated dust, or mechanical wear. Pay special attention to coils, filters, drainage trays, and blower units. Look for signs of moisture buildup, bacterial growth, or blocked passages that could impede airflow and system efficiency.
As you complete the inspection, make detailed notes about the system condition.
 Your next step will involve preparing for deep cleaning and sanitization of the individual components you have just carefully removed.
Step 3: Deep Clean Coils, Blowers, and Drainage Trays
Deep cleaning your HVAC components is a meticulous process that requires careful attention to detail and specialized techniques. In this critical stage, you will transform your system from a potential breeding ground for contaminants to a pristine cooling machine.
According to Project HVAC, cleaning condenser coils and fins is essential for maintaining system efficiency. Start by using a soft bristled brush to gently remove loose dirt and debris. Critically ensure all electrical power to the unit is completely disconnected before beginning the cleaning process. For coils, prepare a specialized cleaning solution designed to break down stubborn grime without damaging delicate metal surfaces.
Begin with the blower unit by carefully removing accumulated dust and debris. Use compressed air and microfiber cloths to clean fan blades and internal mechanisms. Pay special attention to drainage trays where moisture can create ideal conditions for microbial growth. Clean these trays thoroughly with an antimicrobial solution to prevent bacterial and mold development. Inspect all components for signs of wear or damage while cleaning, taking note of any areas that might require professional repair or replacement.
As you complete the deep cleaning process, your HVAC system will be primed for the next critical stage of sanitization and disinfection.
Step 4: Sanitise Ducts Using Hospital-Grade Biosanitisers
Sanitizing your HVAC ducts is a critical process that transforms potential microbial breeding grounds into clean and safe air pathways. This stage requires precision and specialized hospital-grade biosanitisers to eliminate harmful microorganisms effectively.
According to Meegle, the sanitization process involves applying targeted antimicrobial treatments to HVAC system components. Begin by selecting a professional biosanitiser specifically designed for HVAC systems that can eliminate bacteria, mold, and potential viral contaminants without leaving harmful chemical residues. Ensure complete coverage of all internal duct surfaces using specialized spray equipment that can reach every corner and crevice.
Apply the biosanitiser systematically using a consistent spraying technique that guarantees uniform distribution. Allow sufficient contact time for the solution to effectively neutralize microorganisms. Wear appropriate personal protective equipment during this process and ensure proper ventilation. After application, use high-efficiency air movers to facilitate complete drying and prevent moisture accumulation that could compromise the sanitization effort.
With the ducts thoroughly sanitized, your HVAC system is now prepared for the final reassembly and performance verification stage.
Step 5: Reassemble System and Verify Cleanliness
Reassembling your HVAC system is the final critical stage that transforms your meticulously cleaned components back into a fully functional cooling machine. This process requires precision and careful attention to ensure every part returns to its original position with optimal performance.
According to Tony Kelly Inc, the final steps involve carefully reassembling system components and thoroughly verifying cleanliness through comprehensive performance testing. Begin by referencing the photographs you took during disassembly to ensure each component returns to its exact original location. Carefully reconnect electrical connections and secure all panels and access points. Pay special attention to alignment and fitting to prevent future air leaks or mechanical stress.
After reassembly, conduct a comprehensive system test. Turn on the HVAC system and monitor airflow, listening for any unusual sounds and checking temperature consistency across different zones. Verify that air registers are producing clean and consistent airflow. Use a digital airflow meter to measure and compare the current performance against the system specifications. Check for any vibrations or irregular noises that might indicate improper reassembly.
Your HVAC system is now cleaned, sanitized and ready to deliver healthier and more efficient cooling for your living space.
![]()
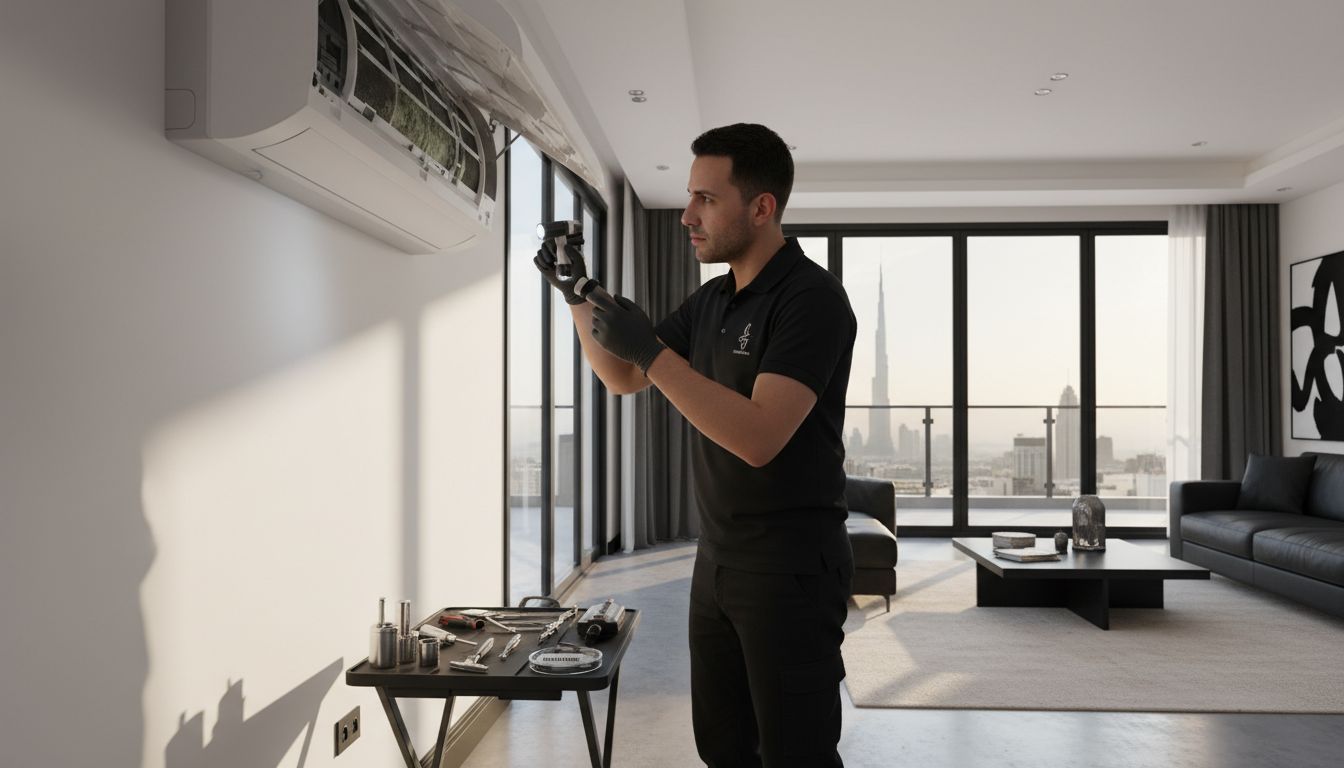
Ensure Healthier Air with Expert HVAC Cleaning from Saniservice
The detailed HVAC cleaning process described in the article highlights the importance of meticulous dismantling, deep cleaning, and sanitization to prevent microbial buildup and maintain system efficiency. If you are concerned about protecting your home or business from harmful mold, bacteria, and allergens, expert help is essential. You deserve professional care that combines science-backed methods with unmatched precision to safeguard your indoor environment.
Saniservice offers exactly that level of expertise. Our NADCA-certified technicians follow rigorous steps to clean and disinfect every AC component using hospital-grade, chemical-free biosanitisers proven to eliminate contaminants. We back every service with in-house microbiology insights and sustainable practices to deliver safer air and longer-lasting systems. Explore real-life success stories and detailed processes in our Case Studies – Saniservice AC Cleaning and discover how your HVAC can benefit by visiting our AC Cleaning & Maintenance – Saniservice AC Cleaning page. Learn more about our commitment to creating cleaner, healthier indoor spaces at https://saniacservice.com.
Don’t wait for poor air quality or costly repairs to impact your comfort and health. Act now and schedule a professional HVAC cleaning with Saniservice to experience science-rooted care that makes a real difference.
Frequently Asked Questions
How should I prepare my workspace for HVAC cleaning?
To prepare your workspace for HVAC cleaning, clear the area of furniture and sensitive items, and establish a space with good lighting and ventilation. Make sure to wear personal protective equipment (PPE) like safety glasses, gloves, and respirators to ensure safety throughout the cleaning process.
What steps should I take to safely dismantle HVAC components?
When dismantling HVAC components, start by disconnecting all electrical connections using Lockout/Tagout (LOTO) procedures. Systematically remove outer panels and organize components in labeled containers, while documenting the system condition with photographs for easy reassembly later.
How do I deep clean HVAC coils and blowers effectively?
Deep cleaning HVAC coils and blowers involves using gentle cleaning solutions and soft brushes to remove dirt and debris. Carefully clean fan blades with compressed air and microfiber cloths, while ensuring that all components are free from moisture and microbial growth in drainage trays to maintain efficiency.
What should I use to sanitize my HVAC ducts?
To sanitize HVAC ducts, use a professional-grade biosanitiser specifically designed for such systems. Apply the solution evenly to all internal surfaces and allow for adequate contact time to ensure effective germ elimination, followed by air circulation to aid in drying.
How do I verify the cleanliness and performance of my reassembled HVAC system?
After reassembling your HVAC system, conduct a comprehensive test by monitoring airflow and checking for any unusual sounds. Use a digital airflow meter to measure performance and ensure it aligns with the manufacturer’s specifications for optimal functionality.
How often should I clean and sanitize my HVAC system for healthy air?
Aim to clean and sanitize your HVAC system at least once a year to maintain good air quality. Regular maintenance can help reduce contaminants and allergens by approximately 20%, improving overall system efficiency and indoor air health.
Recommended
- Best Air Duct Cleaning Companies Near Me – Expert Comparison 2025 – Saniservice AC Cleaning
- How to Clean Air Ducts DIY for Healthier Homes – Saniservice AC Cleaning
- HVAC Cleaning Explained: Science, Methods, and Impact – Saniservice AC Cleaning
- AC Cleaning & Disinfection – 12 Standard Units of Swiss-Standard Care – Saniservice AC Cleaning
- How to Detail a Car for a Showroom Shine at Home
- Diesel Fuel System Cleaning: Best Practices and Pro Tips 2025 – My WordPress

Leave a Reply