
Air Conditioning Cleaning Checklist for Healthier Indoor Air
Every Dubai property manager knows the frustration of unexpected AC breakdowns right as temperatures climb. Preparing the right air conditioning cleaning checklist tools and personal protective equipment before tackling air conditioning maintenance protects your team and keeps operations running smoothly. With demands for healthier indoor air and lower energy costs rising, mastering each step of the cleaning process transforms routine service into genuine value for luxury villas. Discover how prioritizing safety, efficiency, and expert HVAC preparation supports your property’s performance and reputation.
Table of Contents
Contents
- 1 Table of Contents
- 2 Quick Summary
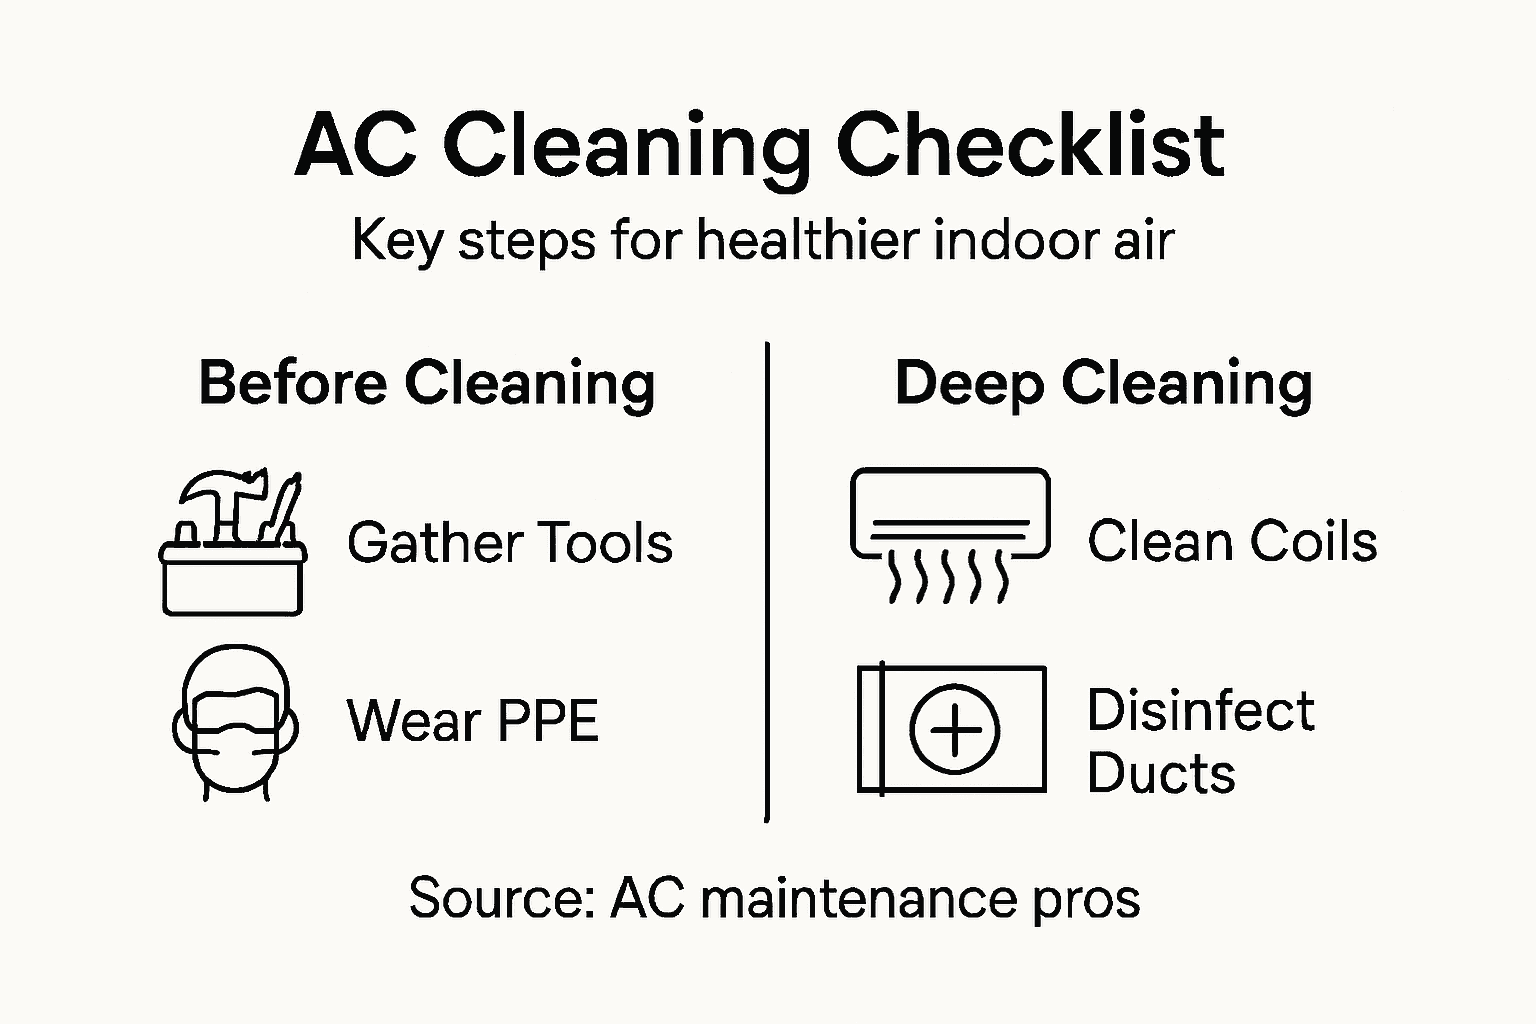
- 3 Step 1: Gather Necessary Tools and Safety Equipment
- 4 Step 2: Turn Off Power and Prepare the Work Area
- 5 Step 3: Dismantle Key AC Components for Inspection
- 6 Step 4: Deep Clean Coils, Blowers, and Drainage Trays
- 7 Step 5: Disinfect Ducts and Filters Thoroughly
- 8 Step 6: Verify Cleanliness and Restore System Operation
- 9 Achieve Truly Healthier Indoor Air with Professional AC Cleaning
- 10 Frequently Asked Questions
- 10.0.1 What tools and safety equipment do I need for air conditioning cleaning?
- 10.0.2 How do I safely turn off the power to my air conditioning system?
- 10.0.3 What steps should I follow to dismantle my air conditioning components?
- 10.0.4 How can I effectively deep clean the coils and blower assembly?
- 10.0.5 What is the best way to disinfect my air ducts and filters?
- 10.0.6 How do I verify the cleanliness of my air conditioning system before turning it back on?
- 11 Recommended
- Step 1: Gather Necessary Tools And Safety Equipment
- Step 2: Turn Off Power And Prepare The Work Area
- Step 3: Dismantle Key AC Components For Inspection
- Step 4: Deep Clean Coils, Blowers, And Drainage Trays
- Step 5: Disinfect Ducts And Filters Thoroughly
- Step 6: Verify Cleanliness And Restore System Operation
Quick Summary
| Key Point | Explanation |
|---|---|
| 1. Gather Essential Tools and PPE | Assemble hand tools and personal protective equipment to ensure safety and efficiency during AC cleaning tasks. |
| 2. Disconnect Power Before Work | Always turn off the power supply to eliminate electrical risks before starting any maintenance work on your AC system. |
| 3. Thoroughly Clean Disassembled Parts | Perform deep cleaning of coils, blowers, and drainage trays to remove mold, dirt, and contaminants for optimal performance. |
| 4. Disinfect Ducts and Filters | Properly disinfecting ducts and filters is crucial for improving indoor air quality and health for occupants. |
| 5. Verify Cleanliness Before Restarting | Conduct a visual inspection to ensure all components are clean and safely reassembled to prevent future issues and enhance system efficiency. |
Step 1: Gather Necessary Tools and Safety Equipment
Before you begin any AC cleaning project, assembling the right tools and protective gear isn’t just about convenience. It’s about working safely and efficiently. Whether you’re managing a luxury villa or overseeing multiple properties across Dubai, having everything prepared beforehand prevents delays, reduces frustration, and most importantly, protects you and your team from potential hazards associated with HVAC maintenance.
Start by gathering your basic hand tools. You’ll need adjustable wrenches, screwdrivers (both Phillips and flathead), pliers, tape measures, and utility knives for removing panels and accessing components. A multimeter proves invaluable for testing electrical connections before you start work. These core tools from a standard HVAC toolkit allow you to safely disassemble your air conditioning system’s various components without causing damage. Keep everything organized in a tool caddy so nothing goes missing mid-project.
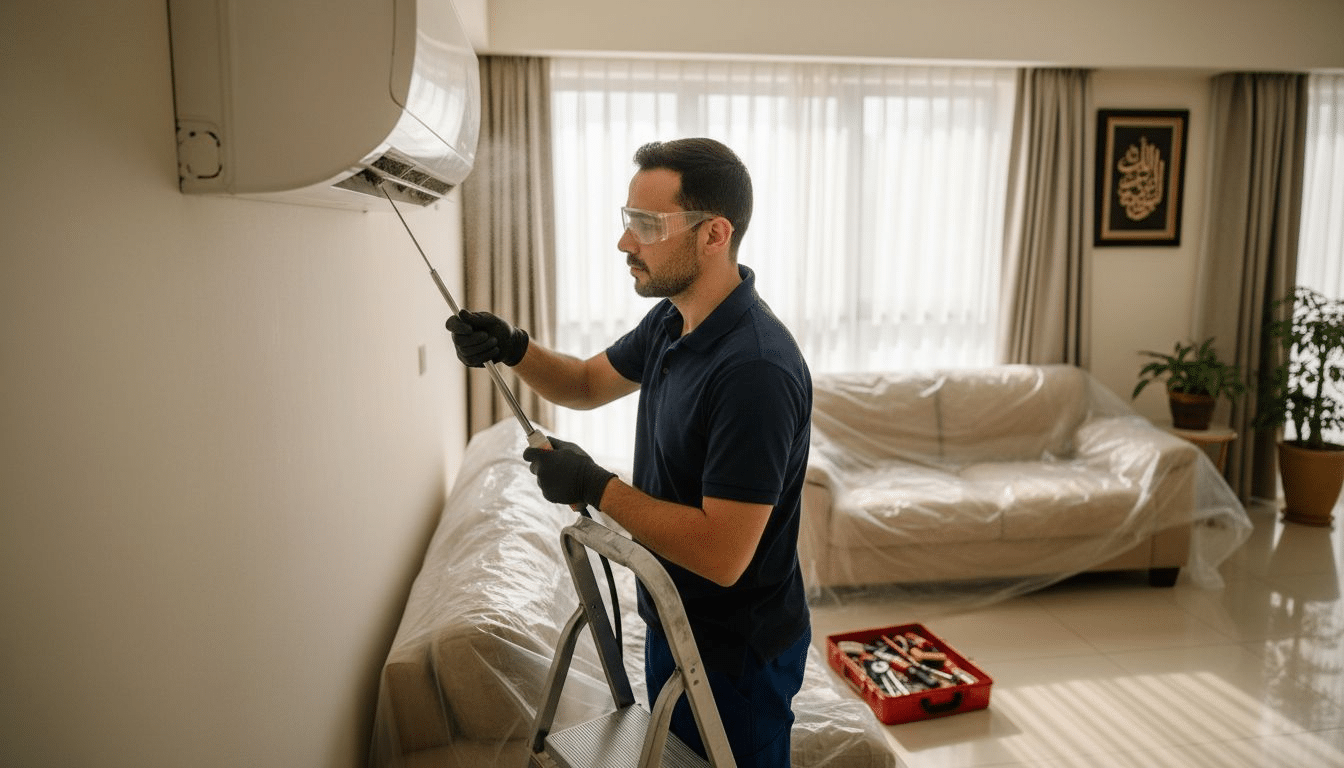
Now for the critical part: your personal protective equipment. Safety glasses with side shields protect your eyes from debris and particles that dislodge during cleaning. Heavy-duty gloves shield your hands from sharp edges, chemical residues, and microorganisms living in neglected systems. Respiratory protection is non-negotiable, particularly in Dubai’s climate where dust accumulation happens rapidly. Safety-toe boots protect your feet if tools or components slip during the process. Many property managers overlook respiratory masks, but when you’re working inside ductwork or around coils where mold and bacteria colonies have established themselves, breathing protection becomes genuinely essential. Don’t skip this step based on cost considerations; the investment is minimal compared to potential health complications.
Consider adding specialized equipment to your toolkit. Soft brushes, fin combs, and coil cleaning solutions help you tackle buildup without scratching delicate aluminum fins. Plastic catch trays collect dirty water and debris during the cleaning process. A wet vacuum designed for HVAC work removes excess moisture safely. These additions transform your project from basic maintenance into thorough professional-grade cleaning that actually restores your system’s efficiency and air quality performance.
Pro Tip: Create a pre-cleaning checklist and photograph your tool setup before starting. This ensures you don’t accidentally leave any tools inside your system and helps you verify everything’s accounted for once your cleaning is complete.
Step 2: Turn Off Power and Prepare the Work Area
This step is where safety and preparation converge. Before you touch a single component of your air conditioning system, you must completely disconnect the power supply and create a controlled work environment. Skipping this stage exposes you to serious electrical hazards and turns your cleaning project into a potentially dangerous situation. Taking thirty minutes to properly shut down and prepare prevents injuries and ensures your work proceeds smoothly without interruptions.
Start by locating your AC unit’s main electrical disconnect switch. This is typically a standalone breaker box or switch mounted near your outdoor condenser unit. Turn it off completely and verify the power is truly disconnected by testing the thermostat. Some property managers make the mistake of only turning off the thermostat, which leaves the compressor and blower motor still energized. You need full system power disconnection before you begin disassembly. If your villa has an older system or you’re uncertain about the electrical setup, consult a licensed electrician. Lock the disconnect switch if possible, or use a warning tag to alert anyone from accidentally restoring power while you’re working inside the system. This lockout procedure protects you and anyone else on the property.
Once power is secured, prepare your work area for the cleaning process itself. Clear the immediate vicinity around your indoor and outdoor units, removing plants, furniture, and anything else that could obstruct your access or get damaged by water and debris discharge. Inform residents and anyone living in the villa or building about the work you’re conducting and where dust and moisture will be generated. Seal off adjacent rooms or areas using plastic sheeting and duct tape to contain particles and prevent contamination spreading to other spaces. Place drop cloths or plastic tarps beneath your work zones to catch dirty water, condensation, and debris. Set up your wet vacuum and collection containers nearby so you can immediately capture material rather than letting it pool on floors or drip onto ceilings.
Pro Tip: Take photographs of your electrical setup before disconnecting anything. This visual reference helps you reconnect everything correctly once cleaning is complete and proves invaluable if you need to troubleshoot reconnection issues later.
Step 3: Dismantle Key AC Components for Inspection
Now comes the detailed work. Dismantling your AC system’s key components reveals what’s really happening inside your unit. Dirt, mold, bacteria, and corrosion hide behind panels and in tight spaces where they multiply unchecked. By carefully removing these parts, you’ll expose exactly what needs cleaning and gain critical insight into your system’s condition. This step separates casual maintenance from the thorough professional-grade cleaning that actually restores indoor air quality.
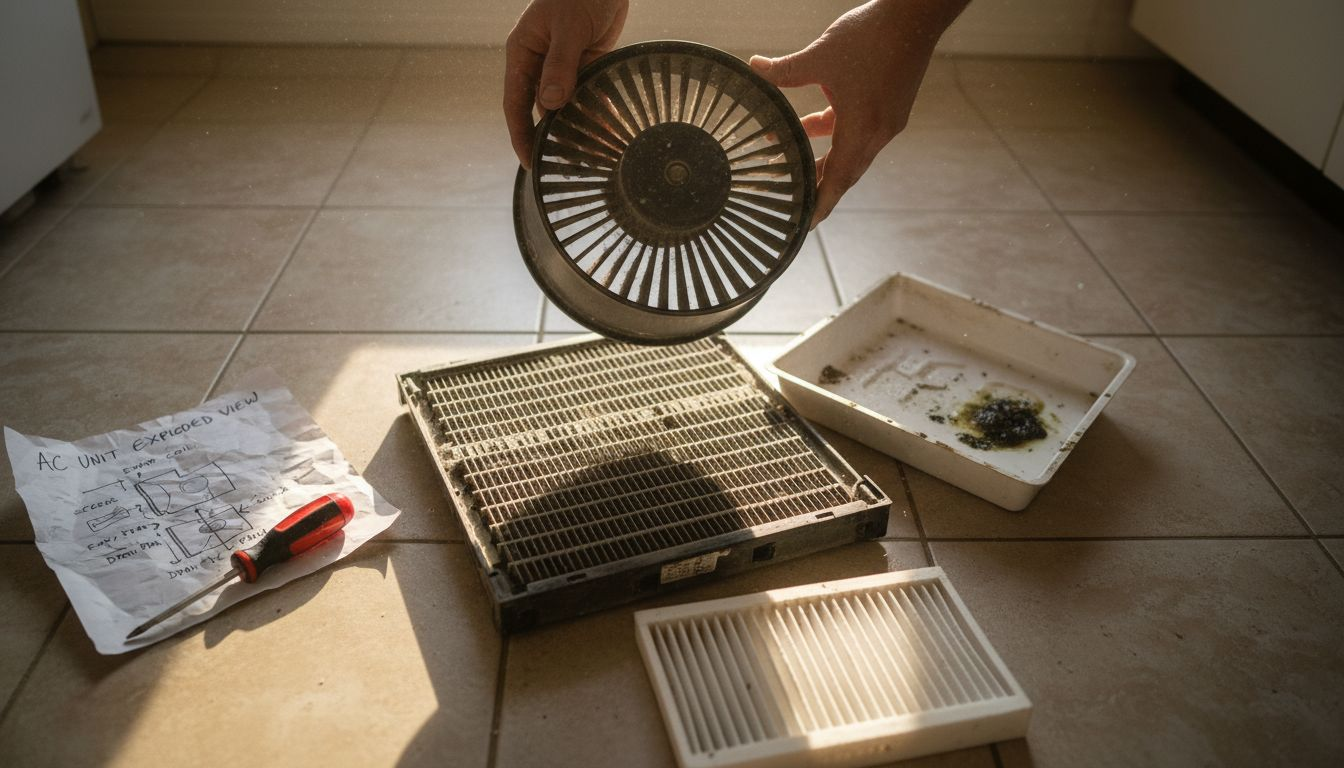
Begin with the air handler unit, typically located in your villa’s utility room or attic space. Carefully remove the access panels by unscrewing fasteners and disconnecting any electrical components that might be attached. Take photos as you go to document the original configuration. Next, locate your evaporator coils. These aluminum fins are where the magic happens for cooling, but they’re also where moisture collects and mold establishes colonies. The dismantling process for evaporator coils requires patience because damaging these fins impacts efficiency. Gently disconnect refrigerant lines (if you’re certified to do so) and remove mounting bolts. Your blower assembly comes next. This fan moves air through your entire system, and it accumulates shocking amounts of dust and debris over months of operation. Remove the blower housing carefully, noting how it connects so you can reassemble it correctly. The drainage tray beneath your coils sits at the bottom, collecting condensation. This tray frequently becomes a breeding ground for bacteria and mold. Remove it completely to inspect for standing water, sludge buildup, and biofilm formation.
As you disassemble components, you’ll gain insight into how HVAC system inspection reveals equipment deterioration. Look for visible corrosion on metal parts, white or black mold growth, dust accumulation patterns, and damaged or deteriorated insulation. Document these findings with photos. This visual record helps you understand what cleaning methods will be most effective and identifies any components requiring replacement rather than just cleaning. Organize removed parts in a clean area, keeping fasteners and electrical connectors together so reassembly becomes straightforward. Label everything if components look similar.
Pro Tip: Create a detailed parts diagram by photographing each step of disassembly from multiple angles. Number your photos sequentially so reassembly becomes a simple matter of reversing the process and consulting your visual guide.
Step 4: Deep Clean Coils, Blowers, and Drainage Trays
This is where transformation happens. Your dismantled components are now exposed and ready for the deep cleaning that restores system performance and indoor air quality. The coils, blowers, and drainage trays you’ve removed are often the dirtiest parts of your AC system, harboring mold colonies, bacterial biofilms, and years of accumulated dust. Proper cleaning removes these contaminants rather than simply redistributing them back into your home’s air.
Start with your evaporator coils. These delicate aluminum fins require a gentle touch combined with powerful cleaning action. Mix warm water with a mild detergent specifically designed for HVAC coils, then apply it with a soft brush or coil cleaner. Work methodically through each fin row, brushing from the bottom up to prevent debris from settling back onto cleaned sections. Rinse thoroughly with clean water, ensuring no detergent residue remains. For stubborn buildup or biological growth, use specialized detergents and disinfectants designed to remove biofilms from HVAC components. Your blower assembly accumulates shocking quantities of dust that restricts airflow and recirculates particles through your villa. Remove loose debris with a vacuum equipped with a HEPA filter to prevent releasing particles back into the air. Then carefully wash blower blades and housing with a damp cloth and mild detergent. Pay special attention to the blower motor bearings and shaft, where dust combines with moisture to create sludge.
The drainage tray demands your focus because this component frequently becomes a microbial breeding ground. Standing water, algae growth, and bacterial biofilm accumulation occur rapidly in Dubai’s humid climate. Flush out the tray with hot water first to dislodge loose material. Then scrub it thoroughly with a brush to remove sludge and biofilm buildup. Apply appropriate cleaning procedures using detergents to eliminate microbial contaminants from the tray’s surfaces. Rinse multiple times until the water runs clear. Consider treating the tray with a hospital-grade biosanitizer to prevent rapid recolonization before reassembly. Clean the drain line that extends from the tray by flushing it with hot water or using a thin brush to dislodge blockages. Many property managers overlook this line, which becomes a perfect environment for mold and algae growth. Once all components are clean and completely dry, they’re ready for reassembly.
Pro Tip: Photograph your cleaned components before reassembly as a baseline reference. These images prove the condition after professional cleaning and provide documentation for maintenance records that increase your villa’s property value.
Step 5: Disinfect Ducts and Filters Thoroughly
Your ducts and filters are the pathways through which every breath of air in your villa travels. Over time, these components accumulate dust, pollen, mold spores, bacteria, and viral particles that circulate repeatedly through your home. Disinfecting them thoroughly eliminates these contaminants rather than allowing them to recirculate endlessly. This step directly impacts the health benefits you and your family experience from your cleaned AC system.
Begin with your air filters. Standard disposable filters typically require replacement rather than cleaning, though some washable filters can be carefully rinsed and disinfected. If your system uses disposable filters, simply remove the old one and replace it with a new high efficiency particulate air filter rated for your system specifications. For washable filters, gently vacuum both sides to remove loose dust, then soak the filter in warm water mixed with mild detergent for fifteen minutes. Rinse thoroughly under running water until the water runs completely clear. Apply EPA registered disinfectants compatible with HVAC materials according to manufacturer instructions, allowing proper contact time. Rinse again multiple times to remove all disinfectant residue, which can damage sensitive filter media or reduce airflow when the system restarts. Allow the filter to dry completely before reinstalling.
Your ductwork requires equally thorough attention. Dust accumulation inside ducts reduces efficiency and provides a reservoir for microbial growth. Access your ductwork from the main trunk lines and use a brush attachment on your vacuum to dislodge buildup from duct surfaces. Work systematically through each branch line, pushing debris toward your vacuum collection point. For ductwork you cannot easily access manually, consider renting or purchasing a duct cleaning attachment for a wet vacuum. Once you’ve removed loose debris, apply appropriate EPA-approved disinfectants following manufacturer instructions to kill remaining pathogens and biofilms. Spray or apply the disinfectant evenly throughout accessible duct sections, allowing the contact time specified on the product label. This typically ranges from five to fifteen minutes depending on the product. Follow with clean water rinses or allow the product to air dry completely, depending on the disinfectant type. Ensure no chemical residue remains before reconnecting your system.
Pro Tip: Schedule your filter replacement and duct disinfection annually before Dubai’s peak cooling season arrives. This timing ensures maximum efficiency during the months when your AC system works hardest and prevents microbial regrowth that occurs during periods of extended system operation.
Step 6: Verify Cleanliness and Restore System Operation
You’ve completed the intensive cleaning work, and now verification separates a job well done from one that merely looks clean. Before you power your system back on, you need to confirm that all components are truly clean, properly reassembled, and ready to deliver the healthier indoor air you’ve worked to achieve. This verification process also protects your equipment investment by catching any issues before they cause damage.
Start by performing a thorough visual inspection of all components before reassembly. Your evaporator coils should appear bright and free of discoloration, mold, or residual dust. Run your finger along fin rows and check for grit or slimy biofilm. Your blower assembly should be completely dry with no visible debris on blades or housing. The drainage tray should appear clean with no standing water, algae growth, or sludge accumulation. Ductwork should show no visible dust or debris when you shine a flashlight inside. If you find areas that don’t meet these standards, go back and clean them again. Half measures deliver half results. Reassemble all components carefully, consulting your photographic documentation from the disassembly process. Ensure every electrical connection is secure and every fastener is properly tightened. Loose components can vibrate, create noise, or cause operational problems.
Use this reference to ensure maximum cleaning effectiveness:
| Component | Key Inspection Focus | Common Issue |
|---|---|---|
| Evaporator Coils | Mold, dust, discoloration | Reduced cooling efficiency |
| Blower Assembly | Dust on blades, moisture | Airflow restriction |
| Drainage Tray | Standing water, biofilm | Microbial growth |
| Ductwork | Dust, debris, moisture | Air contamination |
| Filters | Clogging, discoloration | Poor air quality |
Once everything is reassembled, perform systematic operational testing before declaring your work complete. Restore power to your system and set the thermostat to cooling mode. Listen for unusual noises that might indicate loose components or debris still trapped inside. Feel the airflow coming from your supply registers, which should be strong and consistent. After the system has run for fifteen minutes, check your return air filter to ensure it’s not immediately clogged with debris freed during cleaning. Proper verification of system cleanliness and function requires checking airflow pressure and listening for unusual sounds to confirm everything operates smoothly. Allow the system to run for at least one hour while you monitor for any problems. Check that condensation is draining normally from your drainage tray and that no water is leaking at connection points. Feel the cold air coming from your air handler to verify proper refrigerant flow and coil function. Your system should now deliver noticeably improved airflow, quieter operation, and genuinely cleaner air circulating through your villa.
Pro Tip: Take photographs and note the date after your cleaning verification is complete. These records document your maintenance efforts, help you track cleaning intervals, and provide evidence of system condition that increases your property value when you eventually sell or lease your villa.
Here’s a quick summary comparing the purpose and impact of each AC cleaning step:
| Step | Main Purpose | Business Impact |
|---|---|---|
| Gather Tools & PPE | Ensure safety and readiness | Reduces delays, prevents injuries |
| Turn Off Power & Prep | Eliminate electrical risks | Protects property, avoids legal issues |
| Dismantle Components | Reveal hidden contaminants | Improves cleaning quality, lowers repair costs |
| Deep Clean Parts | Remove dirt, mold, and biofilm | Boosts efficiency, extends AC life |
| Disinfect Ducts & Filters | Remove allergens and pathogens | Enhances indoor air quality, health benefits |
| Verify & Restore | Confirm cleanliness, safe restart | Prevents system failure, maintains value |
Achieve Truly Healthier Indoor Air with Professional AC Cleaning
Maintaining a thorough air conditioning cleaning checklist is essential for preventing hidden contaminants like mold, bacteria, and allergens from compromising your indoor air quality. The challenges of dismantling, deep cleaning, and disinfecting each component require expert knowledge, precise tools, and hospital-grade solutions to ensure your system delivers safe and efficient airflow throughout your home or villa in Dubai. If you recognize the importance of steps such as turning off power safely, deep cleaning coils and blowers, and disinfecting ducts and filters, but feel overwhelmed by the complexity and health risks involved, Saniservice is here to help.
Explore our comprehensive AC Cleaning & Maintenance – Saniservice AC Cleaning services designed to restore your system’s performance with scientific precision. Backed by a multidisciplinary team and NADCA-certified technicians, we meticulously handle every step from inspection to final verification to ensure your air conditioning system supports a healthier living environment. Ready to elevate your indoor air quality and increase your property value with scientifically proven cleaning methods That are safe chemical-free and effective Visit Saniservice now and discover why healthcare facilities and homeowners trust us for cleaner air. For real results and proven benefits, see our success stories in Case Studies – Saniservice AC Cleaning and take the next step toward a fresher, safer home today.
Frequently Asked Questions
What tools and safety equipment do I need for air conditioning cleaning?
You will need basic hand tools like adjustable wrenches, screwdrivers, and pliers, as well as safety equipment like safety glasses, heavy-duty gloves, and respiratory protection. Gather everything beforehand to ensure a safe and efficient cleaning process.
How do I safely turn off the power to my air conditioning system?
Locate the main electrical disconnect switch next to your outdoor condenser unit and turn it off completely. Verify that there is no power flowing to the system by testing the thermostat before beginning your cleaning.
What steps should I follow to dismantle my air conditioning components?
Carefully remove the access panels of your air handler unit and take note of how components are connected. Document each step with photos for easy reassembly later, focusing on parts like the evaporator coils and blower assembly for thorough inspection.
How can I effectively deep clean the coils and blower assembly?
Use a mixture of warm water and mild detergent designed for HVAC cleaning to gently scrub the evaporator coils. After cleaning, ensure all components are rinsed thoroughly to remove any residue, and allow them to dry completely before reassembly.
What is the best way to disinfect my air ducts and filters?
Remove your air filters and replace them with new ones if they are disposable, or rinse washable filters with mild detergent. For your ducts, use a vacuum with a brush attachment to dislodge dust, then apply an appropriate disinfectant following the manufacturer’s instructions to eliminate contaminants.
How do I verify the cleanliness of my air conditioning system before turning it back on?
Conduct a thorough visual inspection of all cleaned components, ensuring there is no visible dust, mold, or debris. Make sure everything is properly reassembled and test the air conditioning system for noise and airflow consistency for at least one hour before considering the job complete.
Recommended
- Step by Step AC Cleaning Guide for Healthier Indoor Air
- HVAC Cleaning for Energy Efficiency: Proven Impact
- AC Maintenance Step by Step Guide for Cleaner Indoor Air
- 7 Essential Steps for Your HVAC Hygiene Checklist
- Essential Checklist for Boiler Maintenance: Step-by-Step Guide – Skan Plumbing & Heating