

AC Coil Cleaning Procedure for Improved Air Quality
Clear, fresh air is a top expectation for residents in Dubai’s luxury towers, but hidden contamination on AC coil cleaning procedure quietly threatens both comfort and energy costs. Managing these high-end properties requires more than routine filter changes. Consistent, targeted maintenance guarantees that air conditioning systems truly support healthy indoor air quality and efficient cooling. This guide outlines safe, step-by-step coil cleaning practices, highlighting smart choices for professional support and DIY solutions tailored to Dubai’s unique environmental needs.
Table of Contents
Contents
- 1 Table of Contents
- 2 Quick Overview
- 3 Step 1: Prepare the AC system for safe coil cleaning
- 4 Step 2: Access the coils and inspect for contamination
- 5 Step 3: Apply cleaning solution and remove buildup
- 6 Step 4: Rinse and sanitize the coils thoroughly
- 7 Step 5: Verify coil cleanliness and restore system
- 8 Elevate Your Air Quality with Expert AC Coil Cleaning from Saniservice
- 9 Frequently Asked Questions
- 9.0.1 How do I safely prepare my AC system for coil cleaning?
- 9.0.2 What signs of contamination should I look for in the AC coils?
- 9.0.3 How can I effectively clean my AC coils?
- 9.0.4 What is the best way to rinse and sanitize the AC coils?
- 9.0.5 How do I verify that my AC coils are clean after the procedure?
- 9.0.6 When should I consider hiring a professional for AC coil cleaning?
- 10 Recommended
- Step 1: Prepare the AC System for Safe Coil Cleaning
- Step 2: Access the Coils and Inspect for Contamination
- Step 3: Apply Cleaning Solution and Remove Buildup
- Step 4: Rinse and Sanitize the Coils Thoroughly
- Step 5: Verify Coil Cleanliness and Restore System
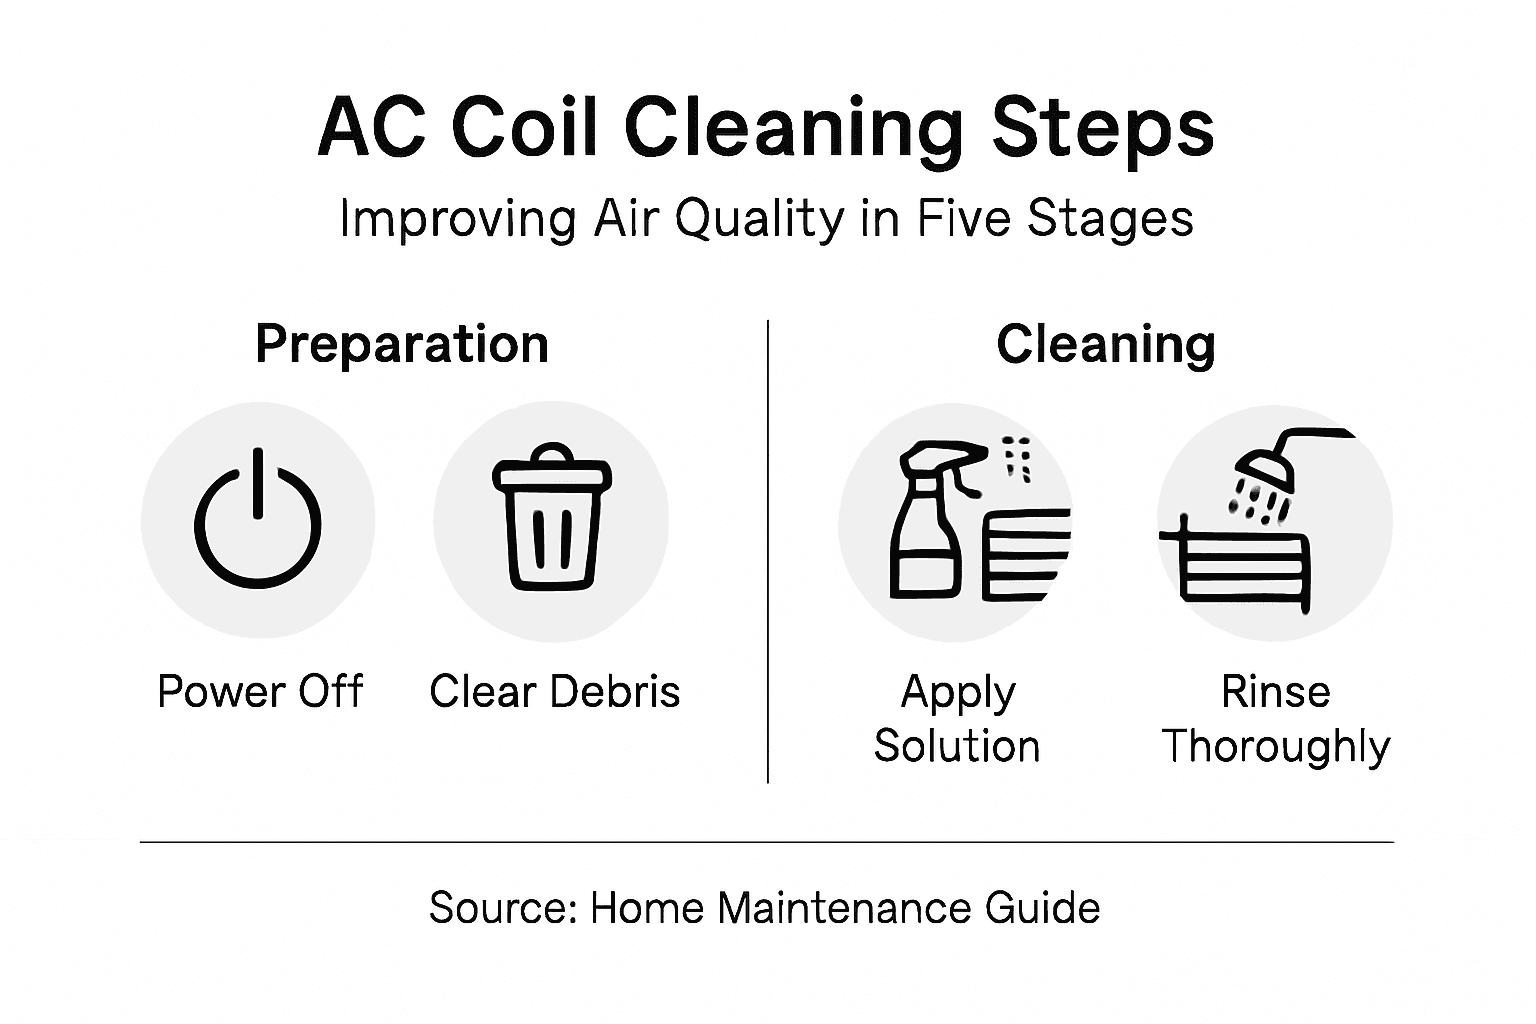
Quick Overview
| Key Insight | Explanation |
|---|---|
| 1. Always power off before cleaning | Shutting off the power prevents electrical hazards while accessing and cleaning AC components safely. |
| 2. Inspect coils for contamination | Regularly check coils for dirt, mold, and moisture that can affect efficiency and air quality. |
| 3. Use appropriate cleaning solutions | A gentle mixture of vinegar and water effectively removes grime and eliminates microbes without damaging coils. |
| 4. Rinse and sanitize thoroughly | Ensure all cleaning residues are removed and use a diluted hydrogen peroxide solution to kill remaining bacteria. |
| 5. Verify system functionality post-cleaning | Conduct an inspection of airflow and cooling performance to confirm the effectiveness of your cleaning efforts and reveal any issues. |
Step 1: Prepare the AC system for safe coil cleaning
Before diving into AC coil cleaning, you must prepare your system for safe and effective maintenance. Proper preparation prevents electrical hazards and ensures you can thoroughly clean your air conditioning components. Safely shutting off power is your first critical step.
Begin by locating your home’s electrical panel and switching off the circuit breaker connected to your AC unit. This guarantees zero electrical current while you work. Next, remove the AC unit’s outer access panel carefully, revealing the internal coils. For split systems in Dubai apartments, this typically means disconnecting the indoor unit’s front panel. Wear protective gloves and safety glasses to shield yourself from potential dust and debris during the process.
Carefully inspect the surrounding area before starting. Remove debris around the outdoor condenser unit, clearing leaves, grass clippings, or any objects within a two foot radius. This prevents potential contamination and ensures optimal airflow during your cleaning procedure.
Pro tip: Always take a photo of your AC unit’s configuration before disassembly to help you reassemble everything correctly after cleaning.
Step 2: Access the coils and inspect for contamination
With your AC system safely powered down, you are now ready to thoroughly examine its internal components. Careful HVAC system inspection requires precision and attention to detail, particularly when assessing coil contamination in Dubai’s challenging climate.
Carefully remove the access panel to expose the coil system. Look for telltale signs of contamination such as dust buildup, visible mold growth, or discoloration on the coil surfaces. Pay special attention to areas where moisture tends to accumulate, as these zones are prime locations for microbial growth. Using a flashlight can help you detect subtle signs of contamination that might be invisible to the naked eye. Microbial contamination control strategies recommend systematic visual surveys to identify potential health risks.
If you notice significant contamination such as thick dust layers, visible mold, or signs of corrosion, it is crucial to proceed with caution. These conditions not only reduce your AC system’s efficiency but can also pose serious health risks to residents. For extensive contamination, consider consulting professional technicians who specialize in comprehensive AC cleaning and sanitization.
Pro tip: Use a small mirror with your flashlight to inspect hard-to-reach areas of the coils, helping you detect contamination in spots you cannot directly see.
Step 3: Apply cleaning solution and remove buildup
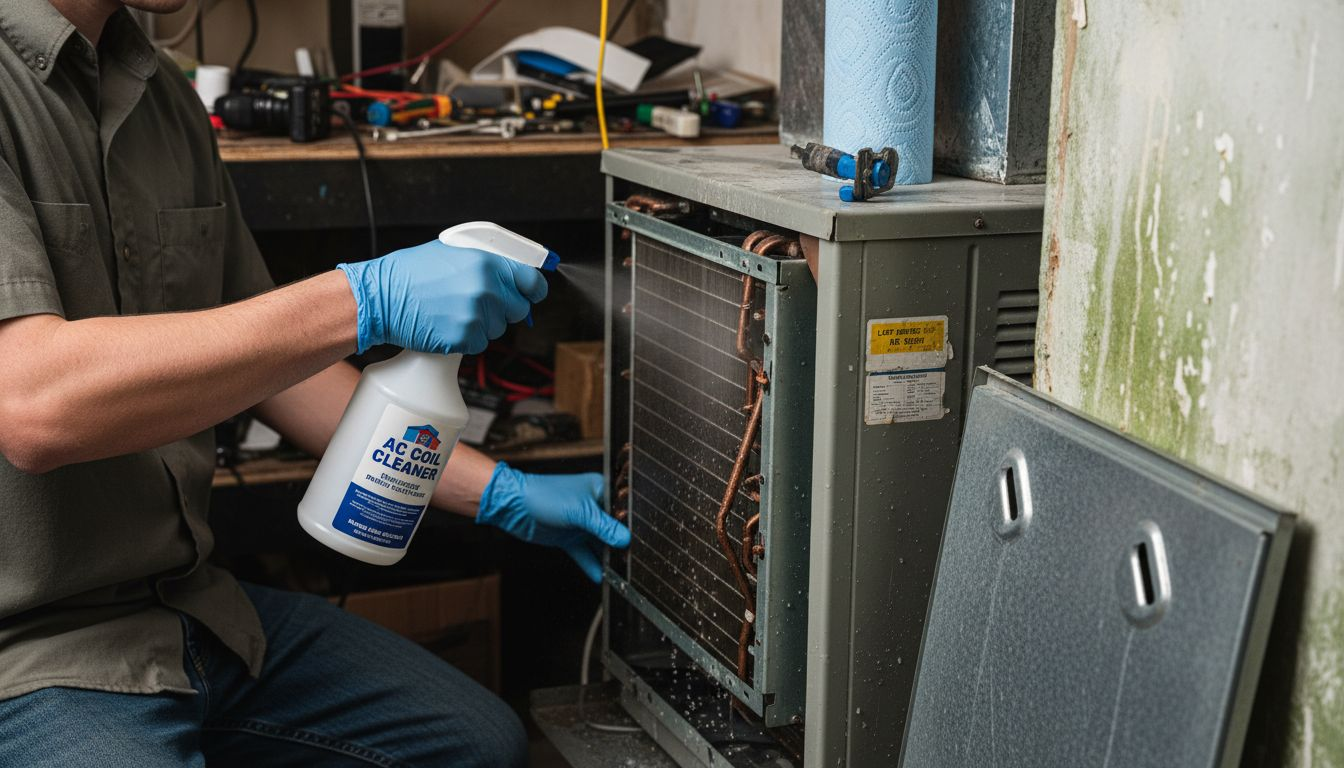
Now comes the critical stage of actually cleaning your AC coils with precision and care. Homemade cleaning solutions can effectively tackle the grime and microbial buildup that accumulates in Dubai’s humid environment.
Prepare a gentle cleaning solution using equal parts white vinegar and water in a spray bottle. Spray the solution directly onto the coils, ensuring even coverage without oversaturating the components. Allow the solution to sit for approximately 10 minutes to break down dirt and kill potential microorganisms. For more stubborn buildup, aqueous cleaning techniques recommend using soft brushes or microfiber cloths to gently agitate and remove accumulated contaminants. Work systematically from top to bottom, being careful not to bend or damage the delicate coil fins.
After cleaning, use a clean microfiber cloth to wipe away the dissolved grime and cleaning solution. Ensure you remove all moisture to prevent potential mold regrowth. If the contamination is extensive or you are unsure about the cleaning process, it is always recommended to consult professional HVAC technicians who can perform a thorough and safe cleaning.
Pro tip: Always wear protective gloves and safety glasses during the cleaning process to protect yourself from potential chemical splashes and debris.
Step 4: Rinse and sanitize the coils thoroughly
After cleaning, the critical next phase is thoroughly rinsing and sanitizing your AC coils to ensure complete removal of contaminants and prevent microbial regrowth. Cleaning and rinsing techniques are essential for maintaining optimal air quality in Dubai’s challenging climate.
Use clean water to gently rinse the coils, ensuring all cleaning solution and loosened debris are completely removed. Spray water carefully to avoid bending the delicate coil fins, working systematically to cover the entire surface. Surface sanitization principles recommend following the rinse with a targeted sanitization step. Prepare a diluted hydrogen peroxide solution to kill any remaining bacteria or mold spores. Apply the sanitizer evenly across the coil surface, allowing it to sit for several minutes before gently wiping with a clean microfiber cloth. This final step helps eliminate potential microbial growth and ensures your AC system contributes to a healthier indoor environment.
Allow the coils to air dry completely before reassembling the AC unit. Proper drying prevents moisture buildup that could lead to future contamination or mold growth. If you encounter extensive contamination or feel uncertain about the process, professional HVAC technicians can provide a comprehensive cleaning and sanitization service.
Pro tip: Use distilled water for final rinsing to prevent mineral deposits from forming on your AC coils.
Step 5: Verify coil cleanliness and restore system
With cleaning complete, the final phase involves carefully verifying your AC coils and restoring the entire system to full operational status. HVAC system cleanliness standards provide critical guidelines for ensuring your maintenance has been thorough and effective.
Conduct a comprehensive visual inspection of the coils using bright, direct lighting. Look for any remaining debris, discoloration, or signs of incomplete cleaning. Check that the coil fins are straight and undamaged, with no bend or distortion from your cleaning process. Performance verification techniques recommend testing airflow and cooling efficiency by carefully reassembling the unit and running a short diagnostic cycle. Listen for unusual sounds, monitor temperature output, and ensure smooth operation.
Reconnect all electrical connections securely, replace access panels, and restore power at the circuit breaker. Turn on your AC system and observe its performance for the first 15 to 20 minutes. Watch for consistent airflow, normal operational sounds, and effective cooling. If you notice any irregularities or decreased performance, it may indicate a need for professional assessment from a certified HVAC technician.
Compare DIY and Professional AC coil cleaning below:
| Aspect | DIY Cleaning | Professional Cleaning |
|---|---|---|
| Cost | Minimal (materials only) | Higher (service fee) |
| Safety | Requires strict self-precautions | Handled by trained technicians |
| Thoroughness | May miss hidden contamination | Detailed, specialized equipment |
| Time Needed | 1-2 hours | 30-60 minutes |
| Suitability | Light contamination | Heavy contamination, mold |
Here’s a summary of key steps and what to watch out for during AC coil cleaning:
| Step | Main Action | Critical Check | Common Issue |
|---|---|---|---|
| Preparation | Power off and open AC unit | Confirm no electrical current | Skipping protective gear |
| Inspection | Examine coils for contamination | Look for mold and heavy dust | Missing hidden spots |
| Cleaning | Spray and wipe with solution | Avoid bending coil fins | Using harsh brushes |
| Rinsing | Thoroughly rinse and sanitize | Remove all cleaning residue | Leaving excess moisture |
| Verification | Inspect and restore system | Monitor airflow, cooling | Overlooking bent fins |
Pro tip: Take before and after photographs of your coils to track cleaning effectiveness and document your maintenance process.
Elevate Your Air Quality with Expert AC Coil Cleaning from Saniservice
Proper AC coil cleaning is essential to prevent microbial contamination, mold buildup, and reduced system efficiency. While DIY methods offer basic care, challenges like hidden mold, delicate coil fins, and effective sanitization require professional precision. At Saniservice, we understand the importance of thorough inspection, deep cleaning, and scientifically proven disinfection to protect your indoor environment and ensure your AC runs optimally.
Discover how our NADCA-certified technicians use hospital-grade, chemical-free biosanitisers in our detailed AC Cleaning & Maintenance services. Backed by our in-house microbiology laboratory and led by a multidisciplinary Indoor Sciences team, we deliver unmatched air quality and energy efficiency in Dubai. Don’t settle for surface cleaning when you can have expert care that safeguards your health and your AC’s lifespan. Learn from real success stories in our Case Studies – Saniservice AC Cleaning. Take the next step toward healthier air today by visiting Saniservice and scheduling your professional AC coil cleaning service.
Frequently Asked Questions
How do I safely prepare my AC system for coil cleaning?
To safely prepare your AC system for coil cleaning, start by turning off the power at your circuit breaker. Remove the outer access panel of the unit to expose the internal coils and ensure you wear protective gloves and safety glasses during the process.
What signs of contamination should I look for in the AC coils?
When checking your AC coils, look for dust buildup, visible mold growth, or discoloration. Pay special attention to areas where moisture collects, as these spots are most likely to harbor harmful microbes.
How can I effectively clean my AC coils?
To clean your AC coils, mix equal parts white vinegar and water in a spray bottle and apply it directly to the coils. Allow the solution to sit for 10 minutes to break down grime, then gently agitate with a soft brush and wipe away the residue with a clean microfiber cloth.
What is the best way to rinse and sanitize the AC coils?
After cleaning, thoroughly rinse the AC coils with clean water to remove any cleaning solution. Follow up by applying a diluted hydrogen peroxide solution to kill remaining microorganisms, allowing it to sit for a few minutes before wiping it off with a microfiber cloth.
How do I verify that my AC coils are clean after the procedure?
After completing the cleaning process, conduct a visual inspection of the coils under bright lighting. Check for any remaining debris, confirm that the coil fins are straight, and ensure smooth operation by running a diagnostic cycle to monitor airflow and cooling performance.
When should I consider hiring a professional for AC coil cleaning?
If you notice extensive contamination, such as thick dust layers or mold, consider hiring a professional for your AC coil cleaning. They have the specialized equipment and expertise needed to ensure a thorough and safe cleaning, promoting better air quality.


Leave a Reply